Fun 4 Point Shamrock How-To
Fun 4 Point Shamrock How-To
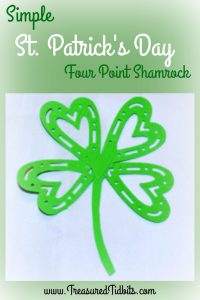
This 4 point Shamrock is another inexpensive and simple project that makes a great decoration, scrapbook accessory, or gift and is simple enough for even tiny little hands to create.
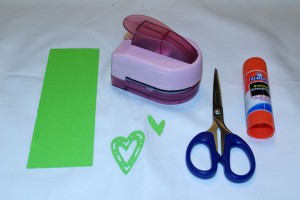
Supplies needed:
- Paper or card stock (I used leftover pieces from my scrapbooking projects.)
- Glue- Elmer’s is fine for everyday but photo safe glue should be used for scrapbooking projects
- Scissors
- Heart punch (I used a large Creative Memories one.)
Fun 4 Point Shamrock How-To
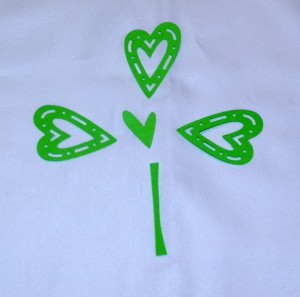
1.) Punch out 3-4 hearts in your desired paper/card stock- I used 4 for my original but 3 for the demo. In this case I prefer the 4 leaf over the 3 leaf due to the shape of the hearts. Experiment with the hearts you have until you find the combination you like.
This punch came with a second smaller heart inside the first- you can see I used it for the center or the shamrock. It helps create a smooth look to the spot where all the pieces come together.
2.) Cut a stem and 2 small circles in matching or contrasting color using the size of your shamrock as a guide. I simply cut a 1/4 inch wide strip of scrap paper and then began to trim it until it was the shape I desired. Fanning (curving) slightly to one side near the bottom. (SEE PHOTO).
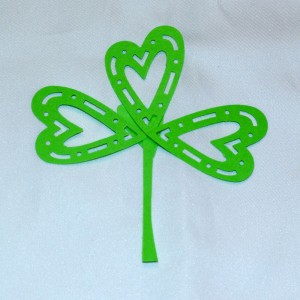
3.) Use a small circle or heart as the center of the shamrock. Place glue on one of the circles-place the top of the stem then the tip of each of the hearts onto the glue.
4.) Take the second circle and place glue on the reverse side and place on top in the middle so that you hide the joined area and give your project a smooth finish. If you like having a little more bling go for it! Add a bead, doodad, sequin or other embellishment to the center of the shamrock. I left the top center heart slightly tipped so that you could see what we were referring to but we will straighten it before adding it to our home decor.
Now you have a completed shamrock.
You can wear it as a pin, create a swag, dress up a window, add it to a scrapbook page or give it to a friend.
For more fun and simple ideas follow our Pinterest board found here.
To see what we are up to daily, see projects unfold and discover fun projects from other bloggers I follow you can follow us on Instragram and Facebook.
2 Comments
Other Links to this Post
-
Treasured Tidbits by Tina Simple St. Patrick's Day Scrapbook Layout - Treasured Tidbits by Tina — July 20, 2016 @ 6:12 pm
-
Treasured Tidbits by Tina 12 Fun & Easy St. Patrick's Day Ideas - Treasured Tidbits by Tina — July 21, 2016 @ 6:58 am
RSS feed for comments on this post. TrackBack URI
