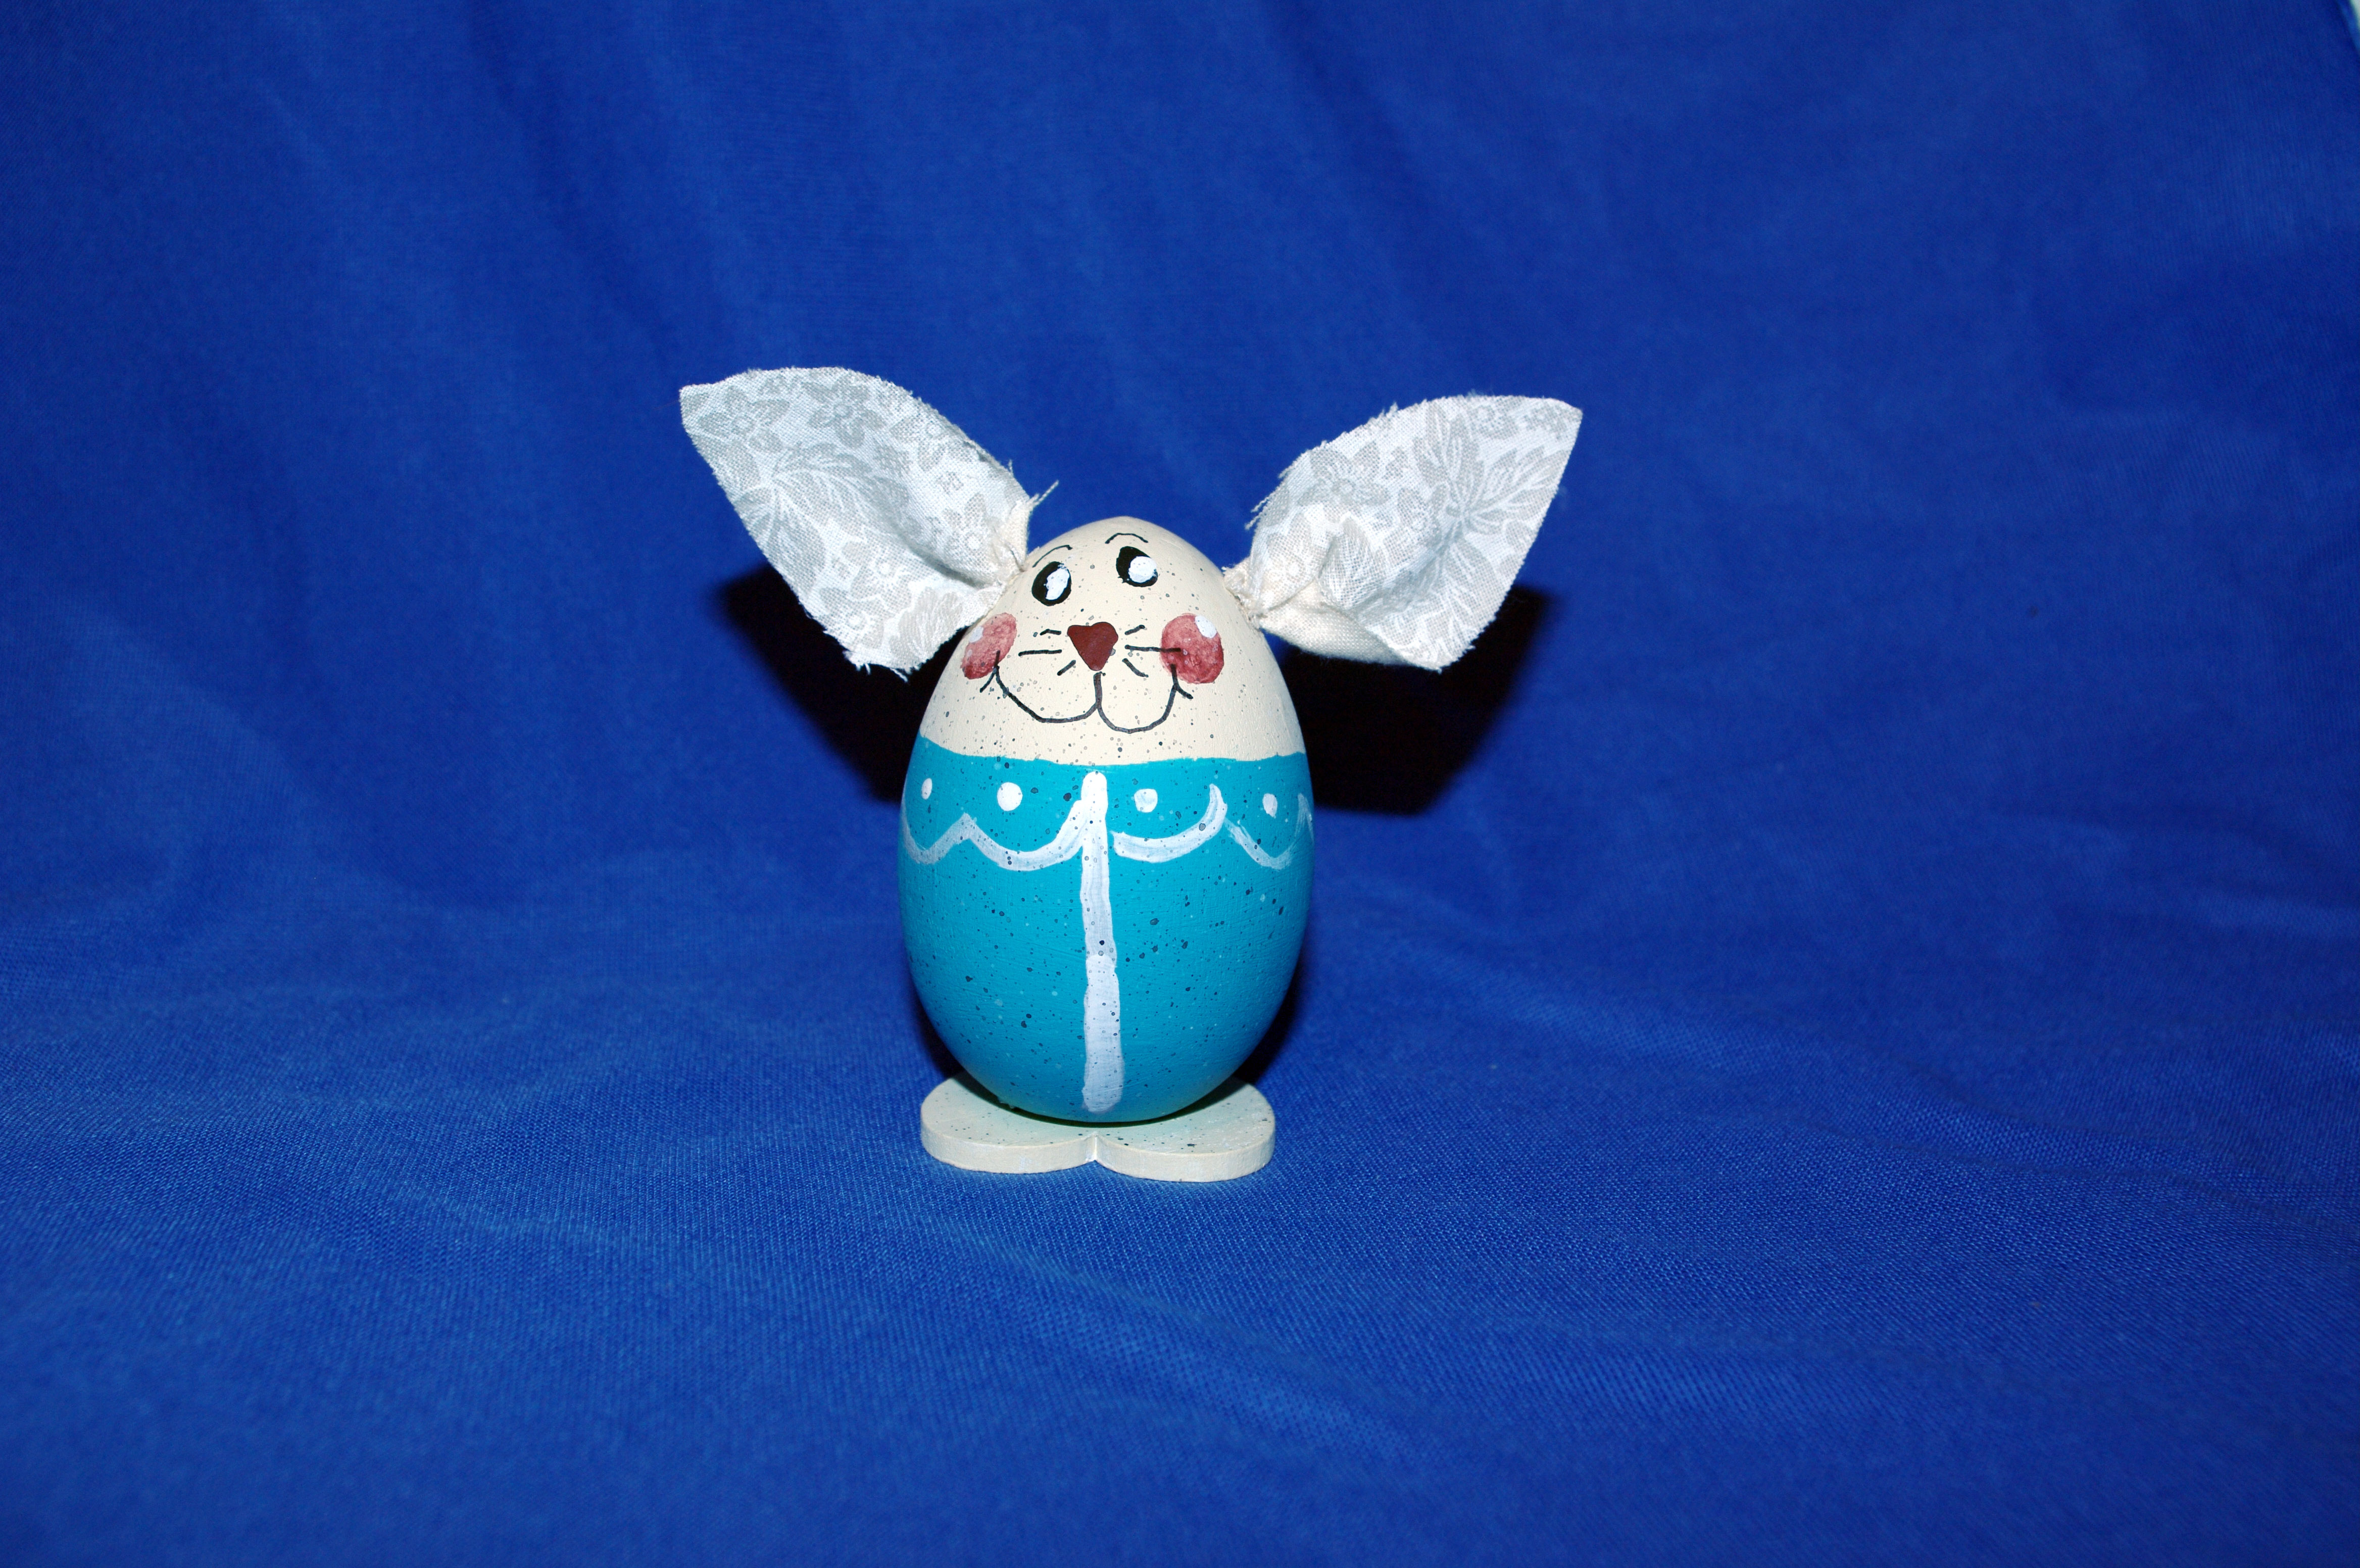
Handpainted Wooden Easter Egg Bunny How To w/video
Adorable Handpainted Wooden Easter Egg Bunny How-To w/Video
Supplies Needed:
1.5 inch wooden heart
1 3/4″ by 2 1/2 ” Wooden Egg (Regularly priced at $1.99 for a bag of 4 at Hobby Lobby.)
White or Beige Pom-Pom (This depends on the color of your bunny.)
White or Beige 2 inch square material
Q-tip
Toothpick
Black Fine-tip Sharpie
Drill with 1/8 in bit
Paint & Brush (I prefer Delta Ceramcoat– We used Black, White, Ivory, Terra cotta (nose), Aqua & Burgundy Rose (cheeks).)
Hot Glue Gun
Old Toothbrush (optional)
Clear coat (optional) We use Rustoleum American Accents 2z Coverage Clear
Printable PDF found here -> Thrifty Handpainted Wooden Easter Egg Bunnies Printout
Video Tutorial
Drill holes for the ears approximately 1/2 inch apart at top of egg. Wipe clean.
Paint the entire egg white or beige, paint top and sides of heart. Allow to dry.
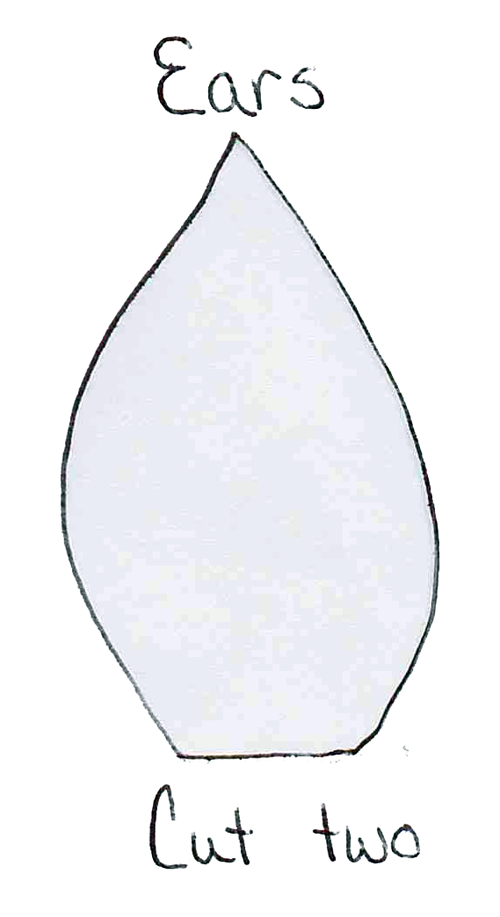
While egg is drying trace and cut bunny ears from your chosed material. See printout.
Paint a second layer of white or beige on the top 1/2 of the egg and apply a 2nd coat to heart top and sides.
Practice painting faces while 2nd coat is drying. (See video and print out)
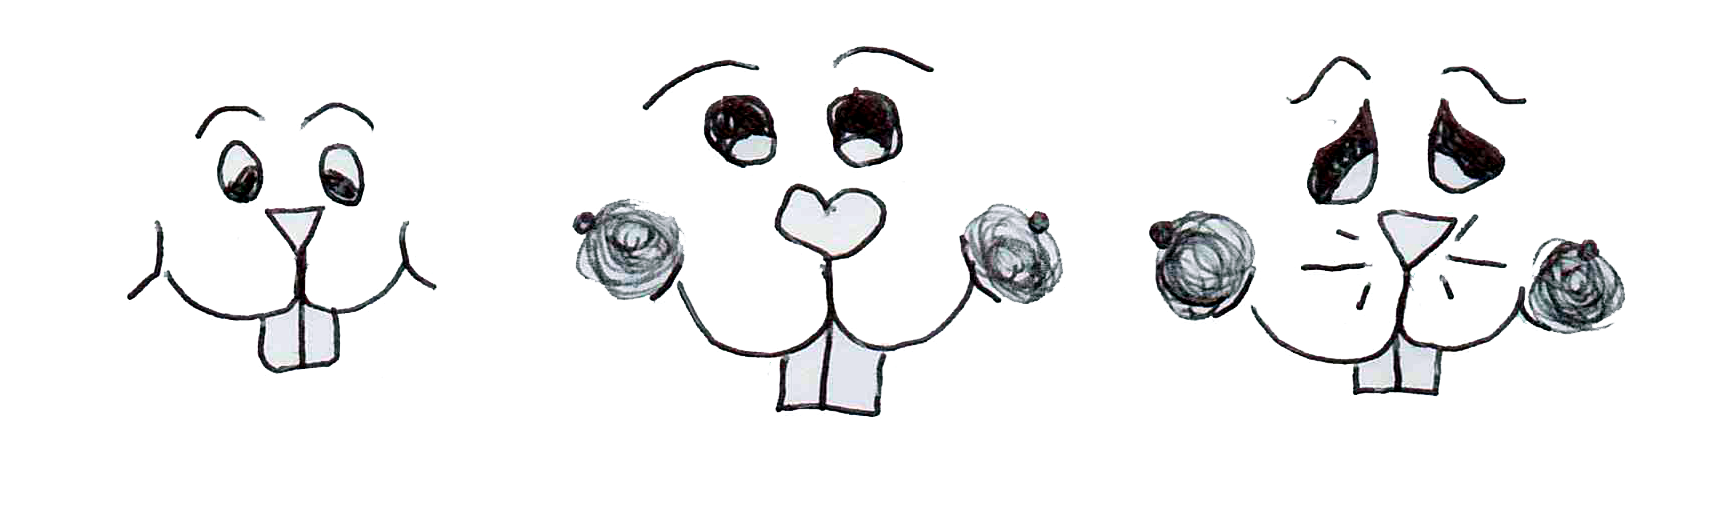
These are some of the faces you can create.
Paint bottom of heart and finish the edges.
Paint the bottom of egg with your clothing color (we chose aqua). Allow to dry.
Apply second coat if needed.
Paint the face you have chosen- refer to print out and video for ideas– remember to use your imagination.
Add accents to clothing- i.e. pockets, hearts, buttons, suspenders, ribbons, etc… Allow to dry.
Apply flecking if desired.- See video
Allow to dry COMPLETELY.
Spray with sealant. I prefer to seal all my crafts with either an indoor/outdoor non-yellowing sealant. It protects them from scratching, moisture, sun, etc…
When the sealant is dry, glue bottom of egg to painted heart to create feet.
Insert ears by adding glue to each ear hole and using a toothpick to push bottom edge of each ear in- be certain to “fold” each ear so that it rounds towards the front. See video for more details if needed.
Glue on the tail and bunny is ready to go!
Check out this bunny family for face and clothing inspirations.
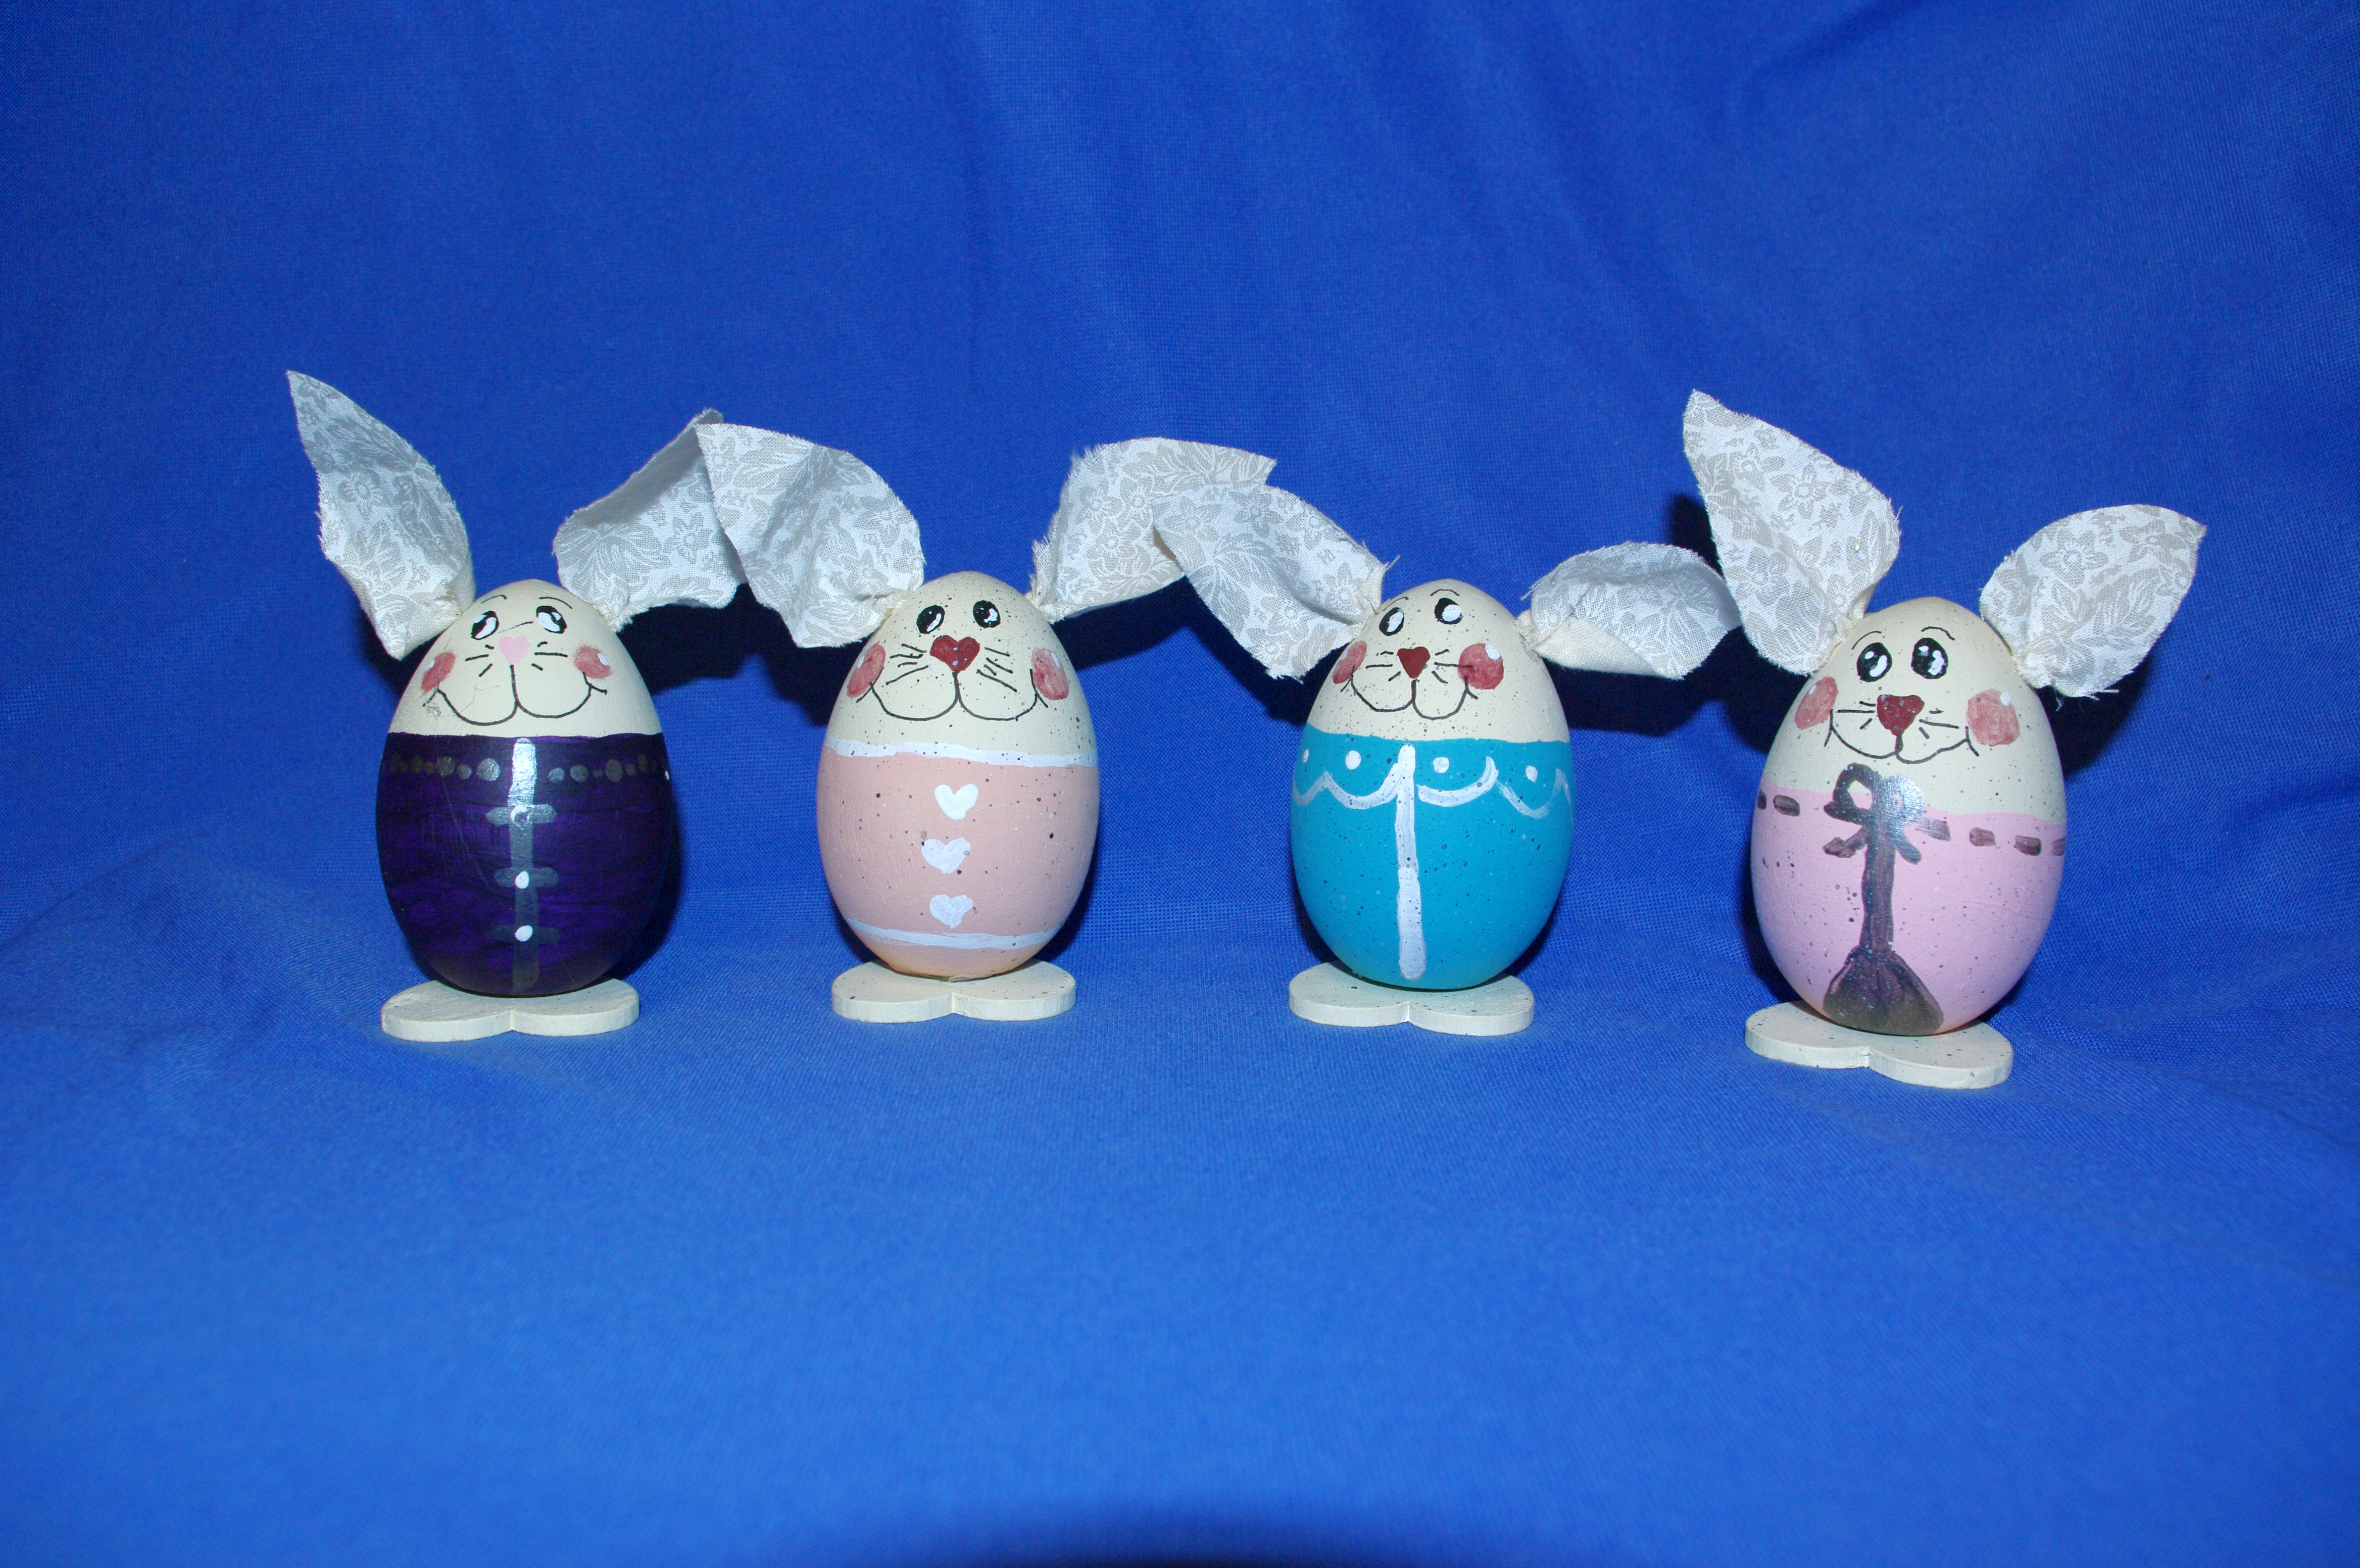
A Variety of Bunnies
Like our Facebook business page for Handmade Treasures by Tina or our browse the Etsy store at Handmade Treasures by Tina.
How did you enjoy this post, video and printout? Did you find it helpful? Did you need more information? Did you make your own? Please share with us your finished projects, improvement ideas, or any questions or comments that you may have.
We encourage you to share this blog and video with anyone you feel would enjoy it.
To discover more great DIY projects follow us on Pinterest, Instagram and Facebook.
Some of the above links are affiliate links and may result in a small compensation from Amazon if you click them, at absolutely no cost or effect to you. To learn more, visit our disclosure policy here.
Tags: Bunny, Easter, Handpainted, Personalized, Spring, Upcycled Wood, Wooden Egg
![]() DIY Projects, Easter | Tina Miller |
DIY Projects, Easter | Tina Miller | ![]() April 6, 2014 7:46 pm
April 6, 2014 7:46 pm
2 Comments
Other Links to this Post
-
Treasured Tidbits by Tina » Handpainted Uncle Sam Picket How-To — January 25, 2015 @ 12:34 am
-
Treasured Tidbits by Tina A Look Back at Our 2014 DIY Posts - Treasured Tidbits by Tina — August 18, 2016 @ 11:15 pm
RSS feed for comments on this post. TrackBack URI