Super Simple Scarecrow How-To w/Printable
 This last weekend we enjoyed a visit with my mother, sister and Grandmother and while they were here I decided we should build some scarecrows. We created three for the yard, which I will share at a later date, and one for my porch.
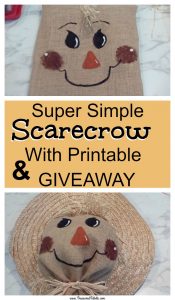
When I began this project I had NO CLUE how I was going to create, build or make a head for our front porch man. I just knew I wanted to make something for my porch, BUT I also knew I wasn’t willing to spend any money. Zero, Zilch, Not.one.cent. So I got creative and this fun, little Scarecrow head was born. After I shared a few photos I discovered several other friends and family thought he was “adorable” and wanted details, so here we are…details on how to make your own or win the one I created here.
I hope you enjoy it and find it as simple to make as we did. I will be sharing the details for how to create a matching body in next week’s “Workshop Wednesday”.
Super Simple Scarecrow How-To
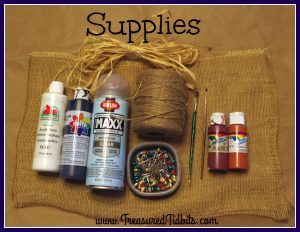
Supplies:
- 2 Pcs of Burlap 12in X 18in We used pieces of a bolt I purchased sometime last year on clearance.
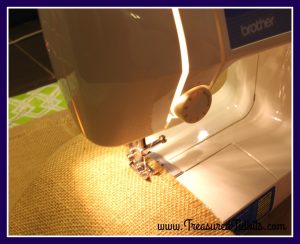
- Needle & Thread or Sewing Machine I used a needle and thread on my personal scarecrow but a sewing machine for the “giveaway” scarecrow. See details below.
- Straight Pins
- Paint-We used Ceramcoat Acrylics in Georgia Clay, Burgundy Rose, White & Black. If you read very many of our posts you will discover that I absolutely LOVE Ceramcoat and use it for every project I possibly can.
- Brushes
- Sealant/Protectant– We used Krylon Cover Maxx Ultimate Coverage. This is the first time I have used it on burlap but I felt that I should protect the paint in some way, and I have always had success with this product & of course, I had it on hand.
How-To
Begin by cutting your burlap to be 12 X 18 inches. The pattern below will fit perfectly, BUT you can change the dimensions to suit your needs. For tips on cutting burlap click here.
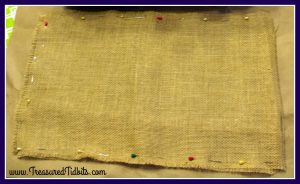
Pin your burlap on three of the four edges to guarantee a straight edge.
Using a thick stitch sew those three edges 1/4 to 1/2 from the edge.
Turn burlap right side out.
Slide a piece of paper or cardboard between the layers of burlap, to avoid paint bleed through.
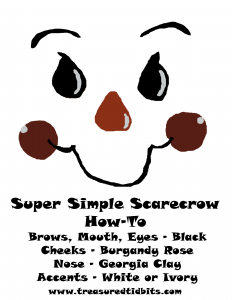
Begin painting. You will find a printable photo and PDF below. I painted in the following order because I free-handed both Scarecrow faces and find it easier to do when I follow these steps.
You can print this PDF version to help with placement and color as needed. printable-scarecrow
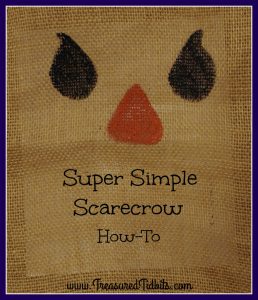
Begin with his nose using the Georgia Clay. This is my absolute favorite color to use for Scarecrow and Snowman noses.
Then his eyes (Black). These teardrop shaped eyes are my signature and I personally find them to be fun to make.
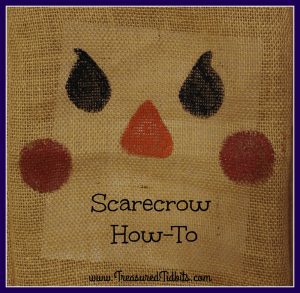
Then his cheeks using the Burgundy Rose.
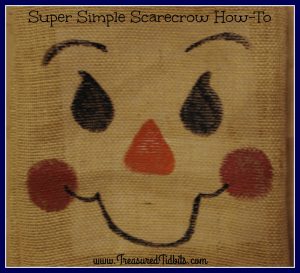
Add the Black accents: eyebrows and mouth.
Once dry add the accent details in Ivory or White with a thin tipped brush. These accents can really bring your scarecrow to life. See the difference of before and after.
Once COMPLETELY dry, move to a well ventilated and spray with the Kylon Clear Protectant.
Add raffia to the top for hair.
See how easy that was? Be sure to check in next week for a peek at my finished scarecrow and detailed instructions on how we built him for ABSOLUTELY FREE and with NO straw, since I am allergic.
Want to win the scarecrow head we shared here? Sign up for weekly email updates and receive the link to enter the giveaway.
 Want to see more great DIY’s? Follow us on Facebook, Instagram, Pinterest and of course, sign up for email updates and giveaways.
This post may contain affiliate links. Please read our disclosure policy here.
This post is linked up at a variety of link ups.
For an extensive list of the link ups we enjoy and link to click here.
4 Comments
Other Links to this Post
-
Treasured Tidbits by Tina Sharing Saturday Link Up #36 - Treasured Tidbits by Tina — September 10, 2016 @ 8:05 am
-
Treasured Tidbits by Tina Zero Budget Scarecrow How-To - Treasured Tidbits by Tina — September 28, 2016 @ 8:02 am
RSS feed for comments on this post. TrackBack URI




By Jonnie, September 12, 2016 @ 12:16 pm
My granddaughters will enjoy making this.
By Tina Miller, September 12, 2016 @ 2:58 pm
I would love to have you share with us in an email to tina@treasuredtidbits.com. I love seeing others projects. 🙂