Master Closet Makeover- We’re Half Way There!!!
I know. I know. You expected a bedroom update this week, and you are getting a master closet makeover instead. I am just too excited to keep it to myself any longer. Huge smile here.
If you follow our FB page or had time to read our “Sharing Sunday” post then you had a peek of my master closet at the end of last week. If not, then THIS is your chance.
Here I am acting like it is a magazine worthy makeover when it’s only part way finished. But I have procrastinated way too long in taking this step and I am just BURSTING with excitement.
Waking up to a clean, organized, purged room and closet everyday for a week has been wonderful!!!
Now, before you get too excited…neither my room nor my closet is finished, but I wanted to share my “in-between” photos and the progress we have made so far.
I love the “Before and After Photos” that most blogs feature, but in reality I always wonder “Was their house really as messy as mine was in process? Did they really do all that in one day?”
I think it is FANTASTIC if they were truly able to clean, purge, organize and reassemble their closets in one day with everything they want and need falling right into place.
But me, personally? No way.
As I have mentioned before, I am a hoarder frugal and keep everything.
Our master closet is not your basic master closet. It is used to store dress clothes and formals for 5 people, special winter coats, craft supplies, scrapbook supplies, extra groceries, clothes my daughters and I share, family games, our sewing machine and way too much more.
Thankfully our closet is fairly large and will accommodate everything,now.
Anyway, enough yammering I am ready to share the changes we have already made.
Remember my bedroom and closet makeover that needed to fit into a $100 budget?
Here is a look at before and now (in transition) side by side.

Can you see the difference in the hanging clothes?

Just 5 little FREE changes made a world of difference.
My husband’s section now contains half of what it did previously and we even added pants to the back. For the past couple of months I was sure EVERY long sleeve shirt my husband owned had the elbows ripped out, EVERY T-shirt and polo was stained and EVERY pair of jeans had a hole. To read “5 Free/Inexpensive Steps to Streamlining Your Closet“ and eliminate the “grunge clothes problem” click here.
THE SHELVES
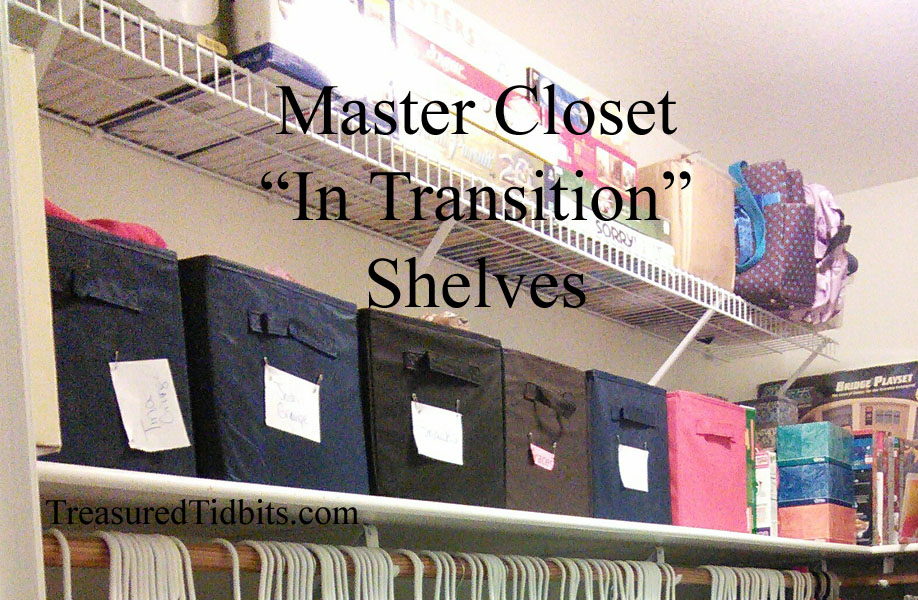
I finally purchased an 8 foot wire shelf and supports from Lowes for $27.76
This was the procrastination part- I don’t like to spend money, and I knew I would want to purge before hanging the shelf.
Before we added the shelf we emptied our ENTIRE closet and moved the existing wire shelf to another wall.
We then slowly and meticulously began returning things to the closet.
After the top shelf was ready we began to evaluate the lower shelf, the one I can reach. This now houses more baskets, which I already owned but had ironically lost in the top of the closet, extra groceries and tissues, as well as, my sewing machine.
The Closet Fabric Drawer will have pretty new labels when the closet is finished. Those are part of the “work in progress” I intend to have done for our “completed closet” reveal.
As you can see, I chose to move my scrapbook and craft supplies to the rear wall, mostly because they fit nicely. Simply put, I like the way it looks.

As you can see, the top shelf here holds hubby’s various odd boxes and items. I didn’t touch it.
THE FLOOR

I decided to streamline the floor as well. We are still working out the details, but this arrangement is so much better than the one previously.
In the “transition” photo you can see that I moved the white shelf unit in from my bedroom AFTER I purged and cleaned it. It still holds printer paper, batteries, scrapbook supplies, show and demo materials and jewelry as well as our camera, video recorder, and more.
The white basket is the scrapbook supplies I am currently using. I love using the basket because I can grab it and go to the kitchen table to work in better light.
The black bag holds tablecloths and backdrops for demos, painting and blog pictures.
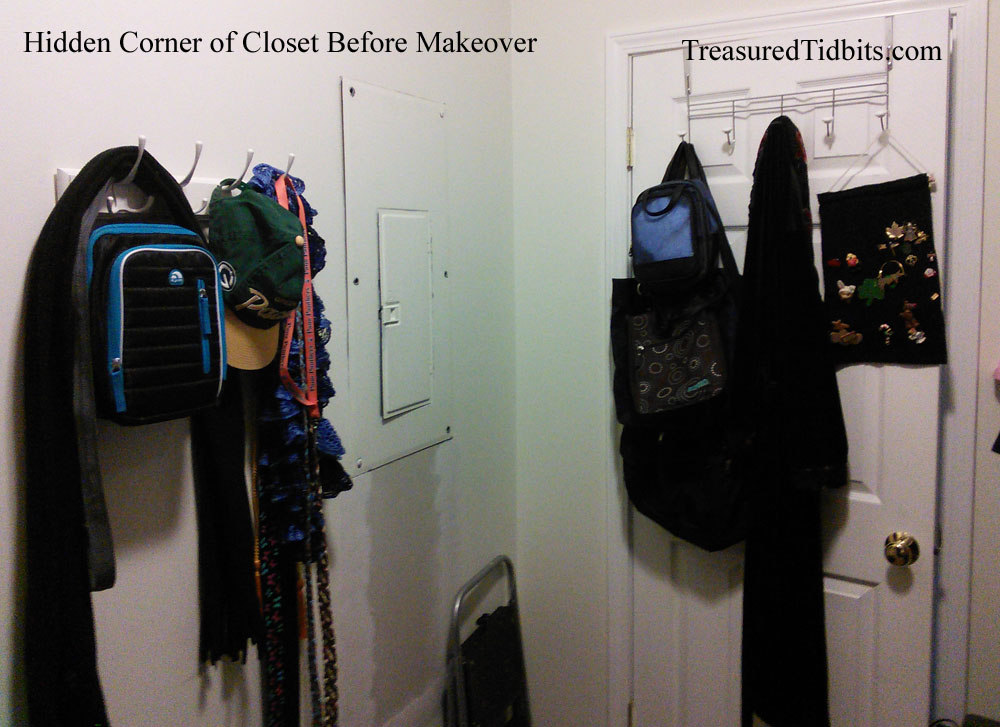
I did not take a “Before” photo of the back wall, but take my word when I say it wasn’t pretty.
It is more streamlined and accessible now but is still not finished. I hope to add some additional storage and items from my room, as well as paint the “unfinished wall”.
Well, folks that is it. Nothing super fancy, amazingly witty or extremely expensive, just a down home gal’s “in transition” master closet makeover.
I have several plans to upgrade and improve the closet arrangement even more, but for now I am quite happy with the improvements we have already made.
Want to see more like this? Leave us an encouraging word in the comments. Follow us on Facebook, Pinterest, Instagram or sign up for weekly emails and receive exclusive FREE printables, upcoming deals and bonus links.
This post is linked up at a variety of link ups.
For an extensive list of the link ups we enjoy and link to click here.
This post contains affiliate links. Please see our disclosure page for details.
Tags: Baskets for Storage, CLoset, Closet Makeover, Closet Organization, Closet organizing, Closet Storage, CLothes, Master Closet Makeover, Storage, Zero Budget Makeover
![]() Cleaning, Organization, Purge | Tina Miller |
Cleaning, Organization, Purge | Tina Miller | ![]() January 6, 2015 11:25 pm
January 6, 2015 11:25 pm
4 Comments
Other Links to this Post
-
Treasured Tidbits by Tina » Master Bedroom Makeover Update #1 — January 23, 2015 @ 8:56 pm
-
Treasured Tidbits by Tina » 5 Simple Inexpensive/Free Steps To Streamlining Your Closet — January 23, 2015 @ 9:34 pm
-
Treasured Tidbits by Tina » 60 Day Power Purge-Day 4- Master Closet Rod-My Success — August 5, 2015 @ 9:34 pm
-
Treasured Tidbits by Tina 5 Simple Inexpensive/Free Steps To Streamlining Your Closet - Treasured Tidbits by Tina — July 15, 2016 @ 7:47 pm
RSS feed for comments on this post. TrackBack URI