Handpainted Stepping Stone How-to
Want to create a one of a kind gift for a parent, friend or yourself?
This hand-painted stepping stone is perfect!
 Last year I found an old stepping stone laying around from a property we no longer own and I was hit with the urge to hand paint it as a Mother’s Day gift.
It was a hit!
Everyone wanted one, but before I offered them for sale I wanted to be certain they would hold up to the crazy Illinois weather.
And they did!
So this year I found some more designs and decided to share one of the simpler patterns with you.
I mean, what good does it do to discover something fun if you can’t share it with others?
I had never painted on concrete before but it was much easier than I anticipated.
Here it is! A hand painted butterfly stepping stone how-to with a printable outline.
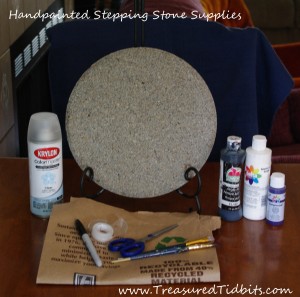
Supplies you will need:
Clean, Dry Stepping stone- (I prefer the ones with a beveled edge.) (These run $3-$4 at any of your local home improvement stores or Wal-mart.)
Tape
Scissors- to cut out stone shape and outline of your design.
Alcohol- (Not pictured)
Permanent marker
Plain White Paper- to trace or print pattern on. To use this butterfly outline- click on the above hand drawn photo for a link to print.
Brown Paper Bag- to trace the outside of the stone to create a paper pattern. (I have found, that if I don’t, I don’t center my design as well as I would like and paint doesn’t come off concrete very easily.)
Paint- I used Ceramcoat and Apple Barrel Acrylic in white, purple and black.
Tip: I used the white to lighten the purple I had on hand. I live in a small town and can’t run to the store every time I run out, so I have learned to “mix” my own.
Sealant– THIS is important if you wish for the paint to be protected from the elements. We prefer Krylon Clear Indoor Outdoor Non-Yellowing Spray.
To clean the stones– I simply spray them with a hose & bleach water. Scrub them with a scrub brush, rinse thoroughly and let them dry completely. (If it has been exposed to the elements this may take a few days.)
Tip: Do NOT wear your favorite clothes while doing this. I use a spray bottle to control the bleach, but it never fails that a wind comes up and it almost always lands on me.
Then I clean the top of each stone with alcohol to remove any remaining grease or chemicals. Allow to dry completely.
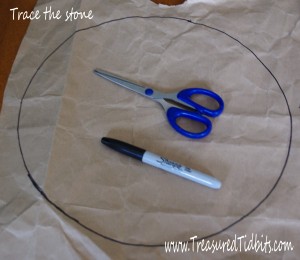
Begin by tracing your stone onto a paper bag. I recommend doing this twice.
Cut out the stone shapes and the outline of your design. It is simple to fill in the details if you have put a base stencil design in (experience talking here).
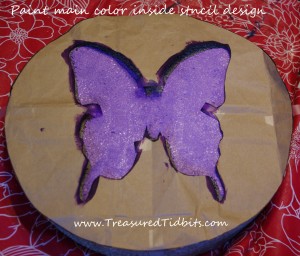
Center your design onto the paper circle and trace with marker. Cut out the center design. If it is not centered, try again.
Tape the paper circle to the top of the stepping stone. Paint with base color. Be certain to cover concrete so that no grey or cracks show through.
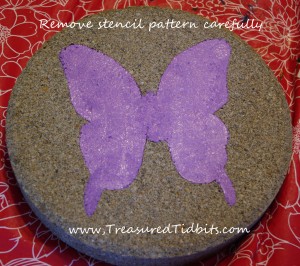
Once dry remove paper stencil.
Touch up the edges with your brush if needed before beginning to shade.
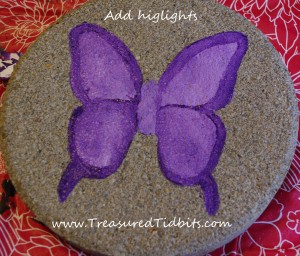
Add desired shading.
I have been seeing lots of Lupus butterflies on a friend’s page and decided I would create a Lupus Butterfly Stone. If you log into our FB page you will see the same outline can be used for a blue butterfly and an orange “monarch”. It is all in how you detail it.
I created this look by adding another layer of the “light purple” I had mixed and before allowing it to dry completely, I outlined it twice with a wide brush to create an “edge” and “fading” look.
After this layer dried more, I added the darker accents of purple, tapering them off.
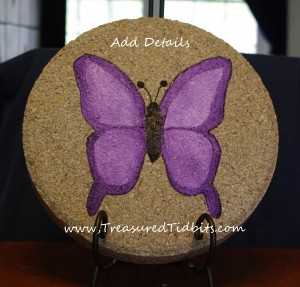
ADD DETAILS.
In this case, I outlined the purple in the original dark purple I had by using a very fine brush.
I then filled in the body and antennae.
As you can see, my design is far from perfect, (my hand still shakes from my shoulder injury), but I like it, and intend to add words at some point.
I chose a simple design so that everyone could try it, but for fancier designs you can find a design you like, enlarge it until the desired size, then follow the steps here. I did this for most of my basic designs and then tweaked them to suit my colors and needs so that I would have the properly proportioned outline design.
To complete your stone, SEAL it a minimum of three times with [easyazon_link identifier="B0789KR7XY" locale="US" tag="treasuredtidbits-20"]non-yellowing CLEAR outdoor polyurethane and your stone should last for years to come.
Note: We have sprayed ours with a fresh coat of sealant every other year and they are holding up great to the crazy weather here.
If you enjoyed this tutorial you might also enjoy:
How We Create Flowers From Repurposed Dishes.
Adorable Handmade Picket Fence Shelf
Please share, pin, like, tweet or comment on this post.
This post contains affiliate links. At no cost to you. See our disclosure policy here.
This post is linked up at the amazing link parties listed here.
We love hearing from you whether it be questions, ideas, suggestions, or encouragement.
We encourage you to share any stones you create. We love to see what others are doing!
As always,
Have Fun Creating!
Check out these other great sites for more inspiring ideas.
Sunday Funday @ The Foley Fam.
2 Comments
Other Links to this Post
-
Treasured Tidbits by Tina A Look Back at Our 2014 DIY Posts - Treasured Tidbits by Tina — August 19, 2016 @ 7:46 am
RSS feed for comments on this post. TrackBack URI






By Rach D, May 6, 2014 @ 5:45 pm
Super beautiful! Love the color purple 🙂
Thanks so much for linking up at “Share Your Stuff Tuesdays”! Please come & link back next week. (Rachael @ http://www.parentingandhomeschoolinginfaith.com)