Master Bedroom Makeover Update #1-Windows & Desk
Today was not a very exciting day for the cosmetic/visual changes in our master bedroom but it was a very productive day.
I considered skipping this post because who wants to see what I cleaned and purged again? BUT the goal is for me to post daily AND stick to the posting schedule so I am going to torture you with the boring details.
As I listed in my original Master Bedroom & Closet Makeover for Under $100 I not only plan to “decorate” but clean, purge and organize, as well.
Today I tackled the desk, windows and wall seen here.
I chose this project because my li’l angels were home from school the past few days and I thought “Oh, I can do this in 30 minutes no problem!”
What was I thinking?
It was supposed to be wipe down the desk, vacuum the edges, under it and then purge the drawers. It spiralled into the following:
1. Full desk purge
2. Disconnect the 1000 cords, move desk then vacuum floor, edges, vent and computer and keyboard.
3. Cord wipe down. Did I mention I hate dust?
4. Wipe down wall, baseboards, window squares, window trim and windows. Thank goodness for Mr. Clean Magic Eraserand Q-tips As I said, I have a bit of OCD so when I began to clean the windows and trim I cleaned every.single. nook and cranny. If you haven’t noticed in previous photos my windows have these beautiful fake panes that are actually created by cleaning supply manufacturers because all they do is collect dust and are impossible to clean properly.
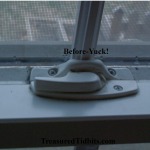
I expected my bedroom windows to be fairly clean. Uh? NO. Moisture + dust=Yuck!
Below is a sample of the frames and their dirt collection.
The windows panes played tricks too. I was sure the glass was clean, on the inside anyway, until I wiped the first pane and my towel came up BLACK! EEEWWW!
But they are clean now!
Even as I felt like Dorothy cleaning windows and watching the world blow by. LOL
I was very disappointed when I didn’t find ruby slippers or munchkins.
What do I mean? We had terrible -30 degree winds today and I decided to clean windows.
Crazy you say? Yep, that’s me!
4. Scrub chair, desk, modem, monitor and keyboard.
My son and I put the desk back and hubby was given the “opportunity” to reconnect all those clean cords.
I snuck a pic while he was working.
As you see from the above list I did NOT wipe down the blinds or wash the curtains. I wanted to spend a little time with the kids.
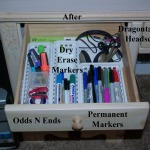
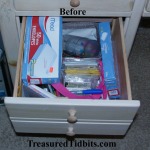
Now for the “Fun Stuff”. The “before and after” drawer pictures. Yes, I like markers. No, I doubt anyone else has a desk full of markers and organization like mine.
I’m just that “special“.
Drawer 1
Drawer 2
Drawer 3
Drawer 4
I couldn’t believe it took only 30 minutes for me to purge ALL the desk drawers including multiple interruptions. Those windows were a different story.
Now, I hope we can keep it this way. And not this way.
Thanks for stopping by and checking out my mess! I hope it inspires you to tackle an area in your home. If you do feel free to share photos or bragging rights in the comments.
Check our master closet project here and how I purged 5 wardrobes (folded and hanging) in 2 days here.
Also check out 15 Unusual Uses For A Pampered Chef Pan Scraper which is only one of the tools I used to tackle this grimy window mess.
Want to know what else we are up to? Follow us on Facebook, Pinterest, Emails and Instagram.
This post contains affiliate links that help keep Treasured Tidbits up and running at NO cost to you. To discover more about it please read our disclosure page here.
2 Comments
Other Links to this Post
-
Treasured Tidbits by Tina Why I Love My New Desk - Treasured Tidbits by Tina — May 10, 2016 @ 11:45 pm
-
Treasured Tidbits by Tina Sharing Sunday #2 - Treasured Tidbits by Tina — August 6, 2016 @ 10:26 pm
RSS feed for comments on this post. TrackBack URI
