Amazing Tissue Paper Candy DIY
Amazing Tissue Paper Candy DIY
In all honesty this project is so simple it will probably take longer to assemble the supplies than it does to create the fun decor.
These life size candies are perfect for birthday parties, Christmas décor, life size Candy Land game, fair or any candy themed party, and made completely from recycled products.
LOLLIPOP
Supplies:
1 Sheet tissue paper any color
Plastic lid This can be from an ice cream, butter, sherbert, cottage cheese, dip etc… depending on the size you need.
Drinking Straw We used some decorative straws we found on sale after Christmas 15 in a pkg for $.10.
Tape
Ribbon We used ribbon leftover from Christmas gift wrapping.
Instructions:
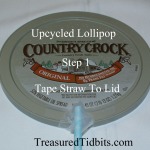
Tape straw securely to lid
Fold tissue paper in half
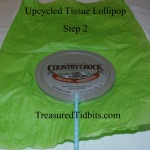
Lay lid on center
Fold tissue paper over and shape around circle
Tape back into place
Turn over and tie ribbon at base of lollipop
Hard Candy
Supplies:
1 Sheet tissue paper
1 Upcycled Plastic Lid Any size
2 Pieces Upcycled Ribbon We used leftover ribbon from a previous hair bow project.
Instructions:
Fold tissue paper in half
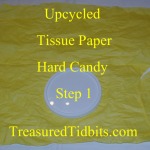
Place lid in center and fold paper over, See photo.
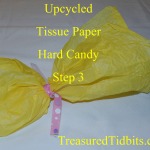
Squeeze left and right sides of tissue paper and tie with ribbon
GUM DROP
Supplies:
2 Sheets paper We used one white and one blue.
Tip: We used two to make the paper thicker and to hide the words on the Cool Whip container we used.
Plastic dome shaped container (Cool whip, dip, sour cream, etc…)
Tape
Tip #2: You can add some fun colored glitter to give it more of a party effect or used pre-glittered tissue paper.
Instructions:
Lay white tissue paper on table
Turn container over in center
Fold and stuff white tissue inside
Repeat with blue tissue
Remember I used the white to cover the words on the container and give the blue a stronger effect. You can use any color you would like.
Tip #3: Go crazy. Add paint swirls, glitter or use a marker to create more specialized treats.
If you enjoy this post and would like to see more simple tissue paper ideas click here.
Thanks for stopping by, I hope this post “sweetened” your day!
For more ideas and zero/low budget tips follow us on Pinterest, Instagram, Facebook and sign up for emails to receive EXCLUSIVE printables beginning in November 2016 (if not before).
5 Comments
Other Links to this Post
-
Treasured Tidbits by Tina 8 Simple Ways to Upcycle Tissue Paper - Treasured Tidbits by Tina — July 17, 2016 @ 2:39 pm
-
Treasured Tidbits by Tina Sharing Sunday - Treasured Tidbits by Tina — August 6, 2016 @ 10:47 pm
RSS feed for comments on this post. TrackBack URI








By Tiffany, January 16, 2015 @ 2:08 pm
These are so cute! They would be good for a birthday or even for Christmas if you make your house a gingerbread house:)
By Pamela Danner, January 20, 2015 @ 8:53 pm
These are so cute!
Thanks for linking up over at 2 Creative Chicks
Have a creative day.
Pam
♥ Scrap N Sew Granny ♥
♥ Pam’s Stitched With Love ♥
By Nana, January 23, 2015 @ 1:16 pm
Too cute. Thanks for linking up over at 2 Creative Chicks
Have a creative day.
Nana
♥ My Crafting Channel ♥
♥ Nana’s Rag Quilts ♥
♥ 2 Creative Chicks ♥
♥ Silhouette Challenges ♥